
Your 1970s brick home has weathered decades of North Texas summers, hail storms, and freeze-thaw cycles — and now the mortar joints are showing it. You've noticed crumbling, powdery lines between the bricks, maybe some white chalky deposits on the surface, and a few spots where the mortar seems to have simply disappeared. You search online and find two terms staring back at you: repointing and tuckpointing. They sound similar. Contractors use them interchangeably. And you're not sure which one your home needs, what it costs, or how to avoid hiring someone who'll make the problem worse. That uncertainty is exactly what this guide is designed to eliminate.
By the time you finish reading, you'll understand the real difference between these two methods, know which one fits your situation, understand what the work actually costs in the Dallas-Fort Worth market, and have the specific questions you need to ask any contractor before signing a contract. No jargon, no pressure — just the information you need to make a confident decision about your home.
Key Takeaways
- Repointing replaces all mortar joints in a section or wall; tuckpointing targets only the deteriorated joints — but most DFW contractors use the terms interchangeably.
- DFW's 30–50 annual freeze-thaw cycles and expansive clay soils accelerate mortar failure faster than in most other U.S. climates.
- Using the wrong mortar type — especially anything harder than Type S on older brick — can cause serious, permanent brick damage.
- Repointing costs in DFW range from $500 for small repairs to $30,000+ for full home restoration, with most mid-range projects landing between $1,500 and $7,500.
- A $2,000 repointing job today can prevent a $20,000 water damage repair five years from now.
- Always verify contractor licensing through TDLR, confirm insurance, and ask specifically about mortar type before any work begins.
- Properly performed repointing can last 20–50 years with routine maintenance and waterproofing.
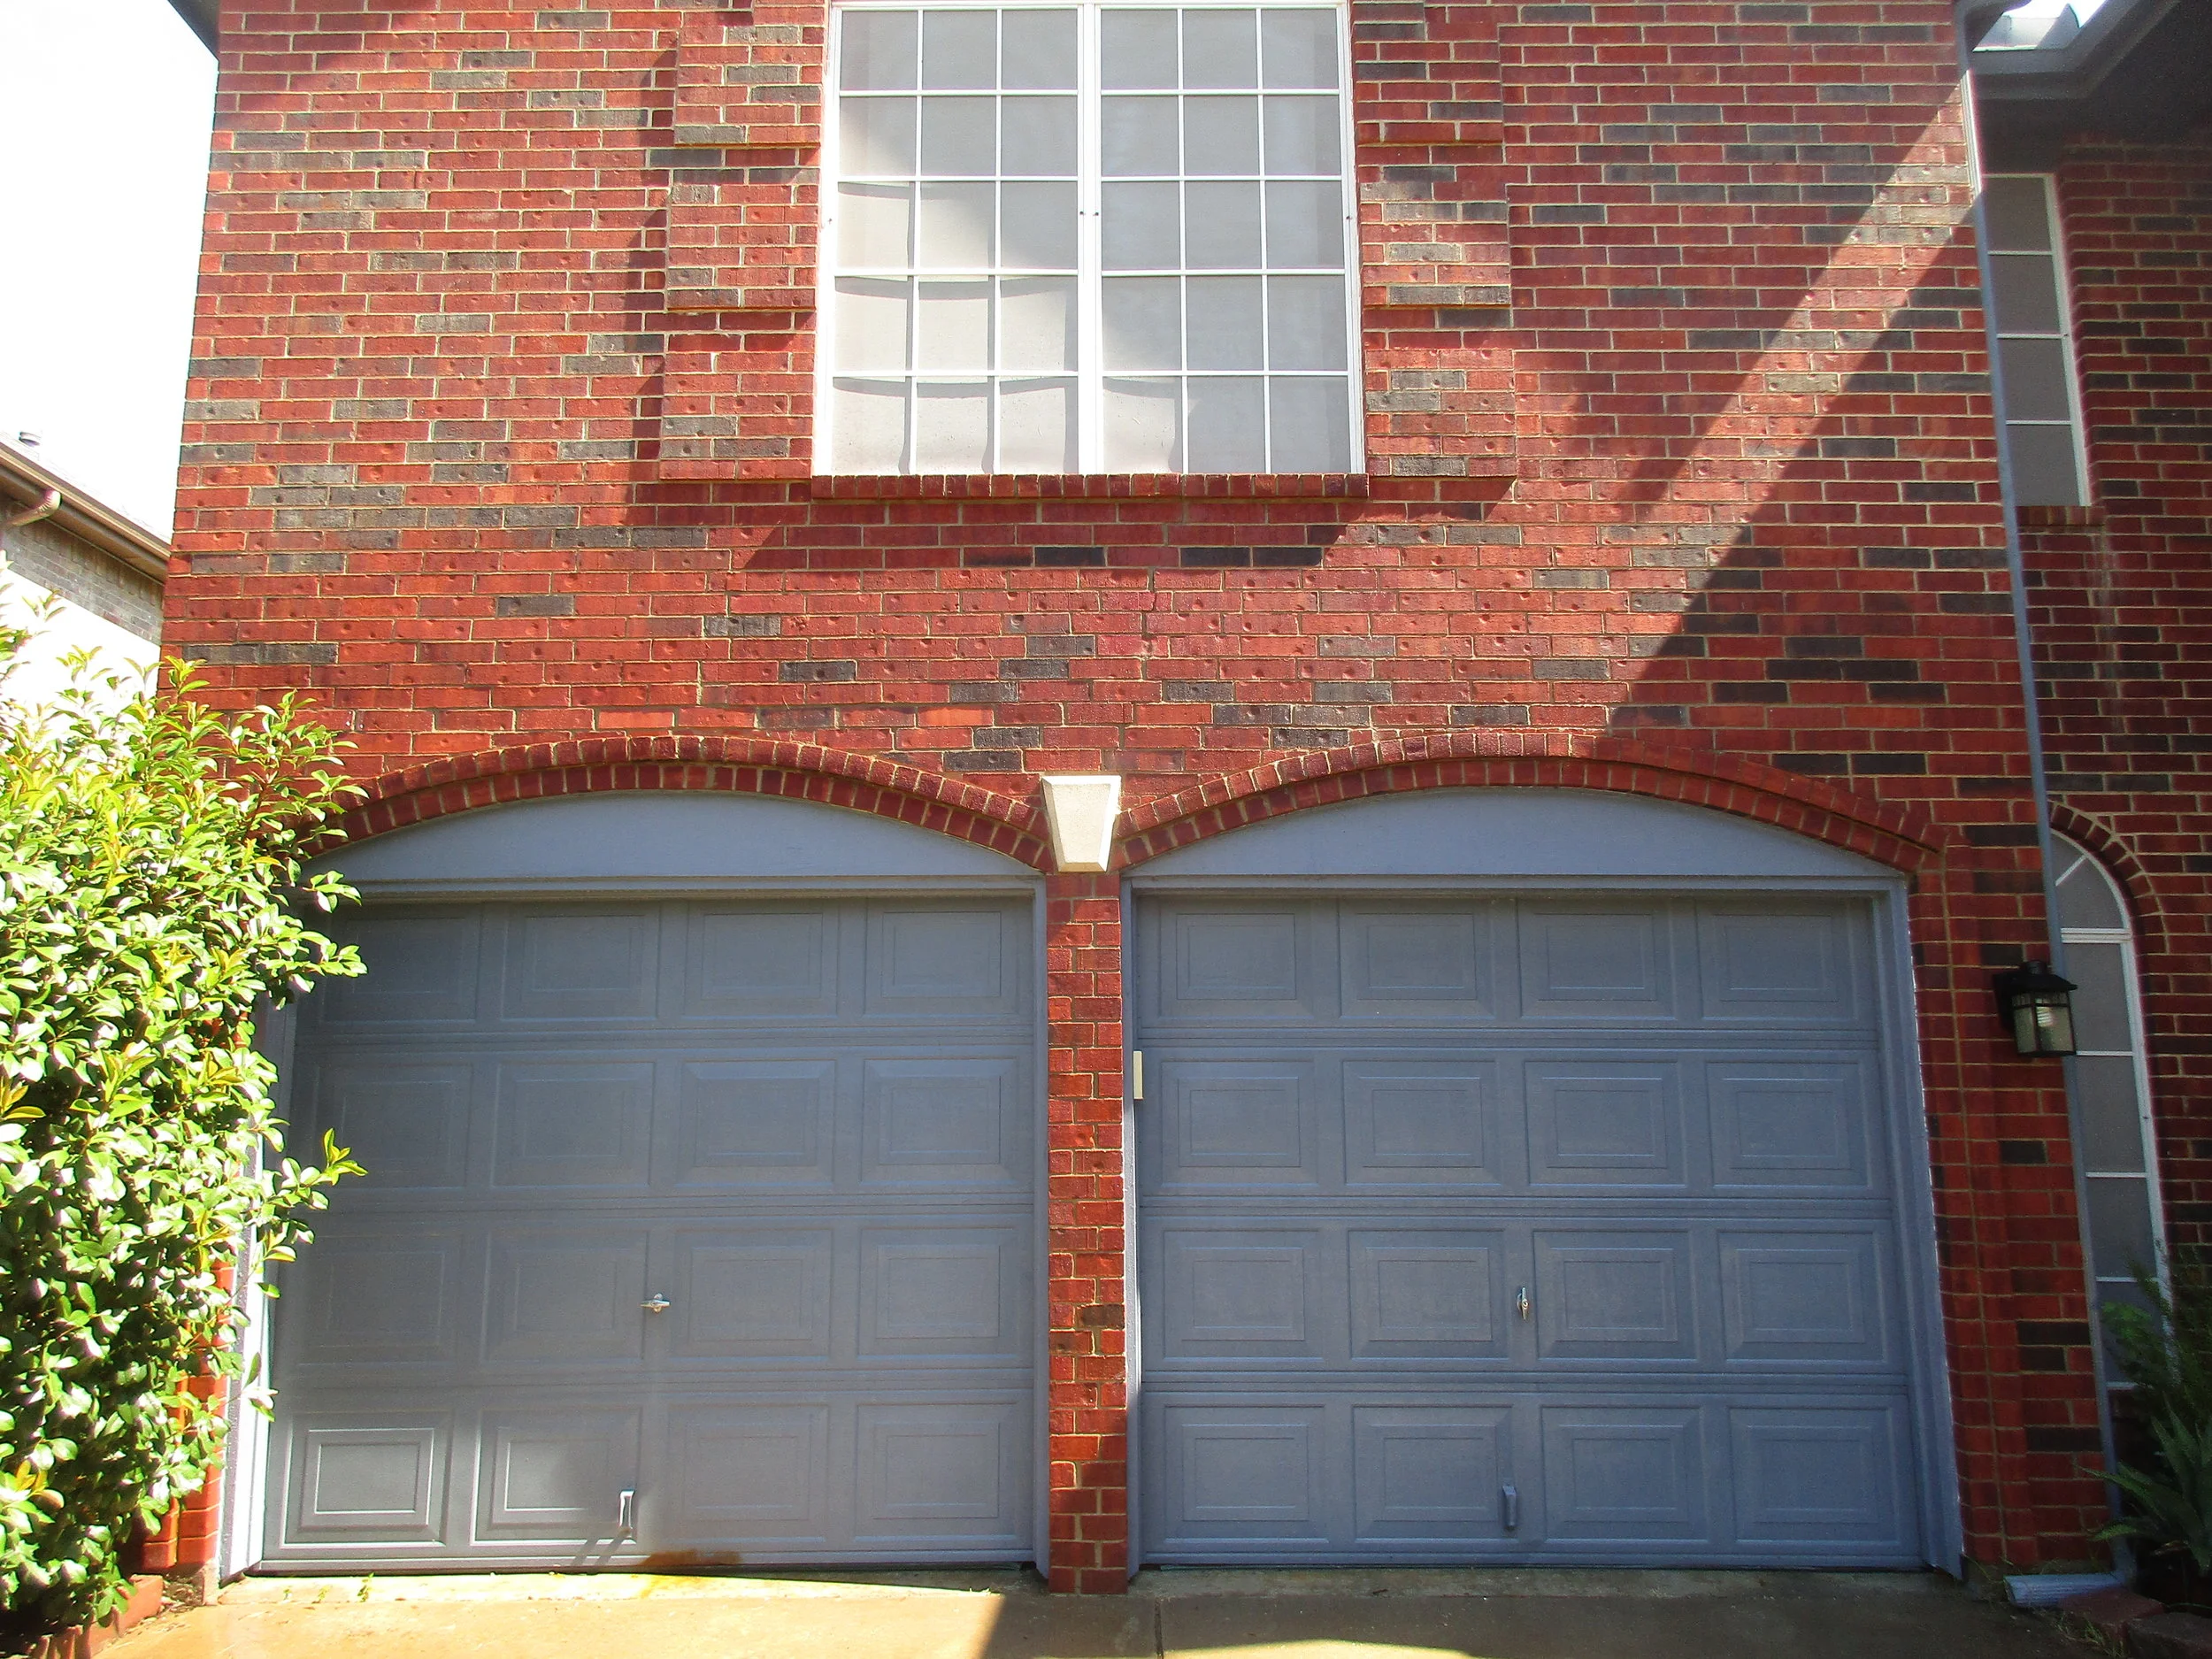
What's the Real Difference Between Repointing and Tuckpointing?
Here's the honest answer: in most DFW contractor conversations, these two words mean the same thing. Both describe the process of removing deteriorated mortar from brick joints and replacing it with fresh mortar. If you call three contractors and ask for "repointing," and then ask for "tuckpointing," you'll likely get nearly identical proposals. But there is a technical distinction worth understanding — not because you need to impress anyone with the terminology, but because it helps you ask better questions and understand what you're actually paying for.
You're Not Alone in Wondering About This
Repointing and tuckpointing terminology confuses most homeowners — even experienced ones. The fact that you're researching this before calling a contractor means you're already ahead of the curve. Understanding the difference gives you a real advantage when evaluating proposals and spotting contractors who don't know what they're talking about.
Repointing: The Complete Restoration Approach
Repointing is the more comprehensive of the two methods. It involves removing old mortar from all joints across a wall or section — not just the visibly damaged ones — to a consistent depth of approximately 2.5 times the joint width. For a standard brick wall with ¾-inch joints, that means removing mortar to a depth of about 2 inches. Every joint is then cleaned, dampened, and refilled with new mortar.
The result is a uniform, cohesive appearance across the entire wall. Repointing is the right choice when deterioration is widespread — when more than 30% of your joints show visible damage — or when you want a consistent look rather than a patchwork of old and new mortar. It's more labor-intensive and more expensive, but it provides a thorough, long-lasting result.
Tuckpointing: The Targeted Repair Method
Tuckpointing, in its precise technical definition, involves removing and replacing only the visibly deteriorated or crumbling joints — leaving sound mortar in place. This selective approach is more cost-effective for localized damage. If one wall face took the brunt of a hail storm, or if your chimney's mortar has failed while the rest of the house is fine, tuckpointing lets you address those specific areas without disturbing mortar that's still doing its job.
The trade-off is appearance. If the existing mortar has aged and discolored, new mortar applied selectively may look noticeably different — a patchwork effect that's aesthetically obvious. A skilled mason can minimize this through careful color matching, but it's something to discuss upfront. For a deeper look at the financial side of these repairs, the guide on how to fix brick walls in DFW breaks down the cost factors in detail.
Both methods serve the same fundamental goal: stopping water from entering your home through failed mortar joints and preventing the structural damage that follows. The method you choose depends on the extent of the damage, your budget, and your aesthetic priorities.
Why DFW's Climate Makes Mortar Failure a Real Problem
Mortar failure isn't something that happens uniformly across the country. The rate at which mortar deteriorates depends heavily on local climate, soil conditions, and weather patterns — and North Texas happens to be one of the more demanding environments for masonry in the United States. This isn't fear-mongering; it's the reality of building materials in this specific geography, and understanding it helps you recognize why proactive maintenance matters here more than it might in, say, Phoenix or Seattle.
Why DFW's Climate Makes This Urgent
North Texas experiences 30–50 freeze-thaw cycles annually, plus expansive clay soils that shrink and swell dramatically with moisture changes. This combination — cycling temperatures and moving ground — accelerates mortar failure faster than in most other U.S. climates. Proactive repointing isn't optional maintenance here; it's a smart investment in your home's structural integrity.
Freeze-Thaw Cycles and Mortar Breakdown
According to National Weather Service historical data, the DFW area experiences between 30 and 50 freeze-thaw cycles per year. Each cycle works like this: water infiltrates small voids or micro-cracks in mortar joints. When temperatures drop below freezing, that water expands — ice occupies about 9% more volume than liquid water. That expansion exerts pressure on the surrounding mortar from the inside out. When temperatures rise again, the ice melts, the pressure releases, and the mortar is left slightly more cracked than before.
Repeat this 30 to 50 times a year, and you can see how mortar that was perfectly sound a decade ago becomes crumbly and porous. The February 2021 winter storm was an extreme version of this process — the sustained freeze caused widespread, accelerated mortar damage across the metroplex that drove a significant surge in demand for masonry repair services. But even in a "normal" North Texas winter, the cumulative effect of these cycles adds up year after year.
Expansive Soils and Foundation Movement
The other major factor is what's underneath your home. North Texas sits on some of the most expansive clay soils in the country, a fact well-documented by Texas A&M AgriLife Extension and geological surveys of the region. These soils absorb water and swell significantly during wet periods, then shrink and crack during drought. The movement isn't dramatic enough to notice on any given day, but over months and years, it subjects your home's foundation — and the masonry walls attached to it — to constant, low-level stress.
That stress shows up in mortar joints as fine cracks that widen over time, as stair-step cracking patterns along joint lines, and as sections of wall that shift subtly out of plane. Homes built on expansive soils are at measurably higher risk of accelerated mortar failure, which is why DFW brick homes often need attention sooner than comparable homes in other regions. Understanding the full range of masonry failures and how to prevent them can help you recognize early warning signs before they become expensive problems.
Add in DFW's frequent hail events — Texas Farm Bureau data shows millions in hail-related property claims annually in the region — and summer temperatures that regularly exceed 100°F, and you have a climate that tests masonry harder than most. The good news is that properly maintained brick and mortar can still last for generations. The key word is "maintained."
Signs Your Brick Walls Need Repointing or Tuckpointing
You don't need to be a mason to recognize when your mortar is failing. Most of the warning signs are visible to the naked eye if you know what to look for. The following checklist gives you a practical starting point for your own inspection — and helps you communicate clearly with a contractor about what you've observed.
- Crumbling or powdery mortar — If you can brush mortar dust off the joints with your finger or a wire brush, the mortar has lost its structural integrity.
- Visible gaps or holes in joints — Mortar that has eroded away, leaving open channels between bricks, is actively allowing water intrusion.
- Cracks in mortar lines — Especially stair-step cracks that follow the joint pattern, or horizontal cracks along a single course of brick.
- Loose or spalling brick faces — When mortar fails and water gets in, it can damage the brick itself, causing the face to flake or pop off.
- Efflorescence — Those white, chalky deposits on brick surfaces are mineral salts left behind when water moves through the wall and evaporates. They're a reliable indicator of water movement through your masonry.
- Water stains or dampness on interior walls — Moisture appearing on interior surfaces near exterior walls or at the foundation line often traces back to failed mortar joints.
- Mortar that crumbles when probed — A simple test: use a screwdriver or key to gently probe the mortar. Sound mortar resists; failing mortar crumbles or falls away easily.
The Visual Inspection Checklist
Walk around your home's exterior on a clear day and examine the mortar joints at eye level and above. Pay particular attention to chimneys (which are exposed on all four sides and take the most weather), foundation walls (which deal with soil moisture and freeze-thaw from ground level), and any wall faces that receive direct sun or weather exposure — typically south and west-facing walls in North Texas.
Take photos of any problem areas you find. This serves two purposes: it helps you track changes over time, and it gives contractors specific areas to evaluate when they come out for an estimate. Note the approximate age of your home — brick built before 2000 is statistically more likely to need mortar attention, and homes built in the 1950s through 1970s are often overdue for their first or second repointing.
If you've spotted any of these warning signs, understanding brick repair costs in your area is a useful next step so you know what to expect when estimates start coming in.
If you've spotted any of these warning signs on your home, a professional inspection can determine the true extent of the damage and the most effective repair approach — before small problems become expensive ones.
Schedule a Free ConsultationMortar Types and Why Choosing the Right One Matters
This is the section most homeowners skip — and it's the one that causes the most expensive mistakes. The type of mortar used in your repointing project isn't a minor detail. It directly determines whether your repair lasts 30 years or fails in 5. And the wrong choice doesn't just mean premature mortar failure; it can permanently damage your brick.
Mortar types in the United States are defined by ASTM C270, the standard specification for mortar used in masonry. This standard defines four primary types — N, S, M, and O — each with different compressive strength, flexibility, and appropriate applications. When a contractor talks about mortar type, this is the framework they should be referencing. If they can't name the ASTM type they plan to use, that's a problem.
The Wrong Mortar Can Damage Your Brick
Using mortar that's too hard — like Type M or straight Portland cement — on older, softer brick causes spalling and long-term structural damage. The hard mortar prevents the brick from flexing naturally and traps moisture inside the wall. This is one of the most common contractor mistakes in the DFW market, and it's entirely avoidable if you ask the right questions upfront. Always verify your contractor specifies the correct ASTM C270 type for your specific brick and climate.
Type N Mortar: Flexibility and Compatibility
Type N mortar has a compressive strength of approximately 750 psi — relatively low compared to other types, but that lower strength comes with an important benefit: flexibility. Softer mortar can accommodate the slight movement and thermal expansion that brick walls experience over time without cracking. This makes Type N the right choice for interior applications, sheltered exterior walls, and — critically — for older, softer brick that needs to flex slightly rather than be locked rigidly in place.
Type N also allows moisture to move through the mortar rather than forcing it into the brick itself. In masonry, the mortar is intentionally designed to be the "sacrificial" element — softer than the brick so that any damage from moisture or movement occurs in the mortar (which is replaceable) rather than in the brick (which is much harder to fix). This principle is important when working with pre-1980 brick, which is generally softer than modern brick.
Type S Mortar: The DFW Standard
Type S mortar sits at around 1,800 psi compressive strength — significantly stronger than Type N, but still flexible enough to accommodate normal wall movement. The Texas Building Code (based on the International Building Code) specifically recommends Type S for exterior walls, chimneys, and areas exposed to weather and lateral loads. For DFW's freeze-thaw cycles, wind loads, and hail exposure, Type S provides the right balance of durability and flexibility.
For most DFW homeowners with brick homes built after 1960, Type S is the appropriate choice for exterior repointing. It's durable enough to handle North Texas weather without being so rigid that it damages the brick. Contractors who know their craft will specify Type S for your exterior work without hesitation — and will explain why if you ask. This is the standard for professional masonry repair that meets code requirements in the DFW area.
The Danger of Type M and Straight Portland Cement
Type M mortar reaches compressive strengths above 2,500 psi, and straight Portland cement is even harder. Both are appropriate for specific structural applications: below-grade foundations, retaining walls, and areas subject to extreme lateral loads. They are not appropriate for repointing standard brick walls, and using them on older or softer brick is a serious mistake.
Here's what happens when mortar is harder than the brick: the brick can no longer flex naturally. Thermal expansion, freeze-thaw pressure, and foundation movement that would normally be absorbed by slight flexing in the mortar joint instead gets transferred directly into the brick face. The result is spalling — the brick surface literally flakes and pops off — and once that happens, the brick itself needs replacement, not just repointing. This damage is irreversible and significantly more expensive to fix.
Storm-chaser contractors who flood the DFW market after major weather events frequently use straight Portland cement or Type M mortar because it's cheap and easy to work with. The work looks fine initially, but within a few years, the damage to the brick becomes apparent. By then, the contractor is long gone. This is one of the most important red flags to watch for when vetting contractors.
Step-by-Step: What the Repointing and Tuckpointing Process Actually Looks Like
One of the best ways to evaluate a contractor's proposal is to know what the process should look like. When you understand the sequence of steps involved in professional repointing, you can quickly identify whether a contractor is cutting corners or doing the job right. This knowledge also helps you set realistic expectations about timeline and disruption.
Pro Tip: Get Sample Patches Before Full Work Begins
Ask your contractor to perform small test patches in inconspicuous areas — a corner near the foundation, or behind a bush — so you can approve the mortar color and profile match before they commit to the entire project. Reputable masons expect this request and welcome the opportunity to demonstrate their color-matching skill. It costs nothing extra and prevents a very expensive mistake.
Joint Preparation and Mortar Removal
The first and most critical step is removing the old mortar. Professional masons remove mortar to a depth of approximately 2.5 times the joint width — for a standard ¾-inch joint, that's about 2 inches of depth. This depth is necessary to ensure the new mortar has enough surface area to bond properly. Shallow removal — just scraping the surface — is a common shortcut that leads to early failure.
Removal is done carefully using angle grinders, oscillating tools, or hand chisels, depending on the joint size and brick type. The goal is to remove mortar without chipping or damaging the brick edges. After removal, joints are cleaned of all dust and debris with compressed air or a brush, then lightly dampened before new mortar is applied. This dampening step is important — it prevents the brick from absorbing moisture from the new mortar too quickly, which would weaken the bond.
Mortar Mixing and Application
Mortar is mixed to a consistency often described as similar to peanut butter — firm enough to hold its shape, but workable enough to be pressed firmly into the joint. Too wet, and it shrinks excessively as it cures; too dry, and it doesn't bond properly. Getting this consistency right requires experience and attention, especially in DFW's summer heat, which can cause mortar to dry faster than ideal.
Mortar is applied in layers rather than all at once. Each layer is packed firmly into the joint using a tuck pointer or similar tool, ensuring there are no voids or air pockets. Voids in the mortar create weak points where water can collect and freeze, accelerating failure. Proper layered application is one of the hallmarks of quality workmanship — it takes more time, but the result is a dense, well-bonded joint that lasts.
Tooling and Finishing
Once the mortar has set to the right stage of firmness — firm enough to hold a thumbprint but not fully hard — the joints are "tooled," meaning shaped to match the original joint profile. Common profiles include concave (the most common and most water-resistant), V-joint, flush, and weathered. The profile matters because it affects how water sheds off the wall. A concave joint, for example, directs water away from the joint center, while a flush joint can hold water against the brick.
Tooling also compresses the mortar surface slightly, which increases density and durability. Color matching happens during this phase — experienced masons adjust pigments or mortar composition to blend with the existing joints. This is both an art and a science, and it's one area where the difference between a skilled craftsman and a generalist contractor becomes immediately visible. If you're considering whether to tackle any portion of this yourself, the comparison of DIY vs. professional masonry work is worth reading before you decide.
Curing and Protection
New mortar needs to cure slowly to develop its full strength — typically 7 to 14 days, depending on temperature and humidity. During this period, the wall should be protected from direct rain and intense direct sunlight. In DFW's summer heat, this is a real concern: mortar that dries too quickly becomes brittle and weak. Professional contractors account for this by scheduling work during cooler parts of the day, using shade cloth if necessary, and lightly misting the wall to slow the curing process.
Any contractor who doesn't mention curing conditions or doesn't plan to protect the wall after application is skipping a step that directly affects the longevity of your repair. It's a reasonable question to ask: "How will you protect the wall during curing, and what restrictions apply to water exposure in the first two weeks?"
Repointing and Tuckpointing Costs in Dallas-Fort Worth
Let's talk numbers — because understanding the cost range before you start getting quotes is one of the best ways to protect yourself from being overcharged or underserved. DFW pricing for repointing and tuckpointing reflects the local market's strong demand, skilled labor costs, and the specialized expertise required for quality mortar work. Here's what you can realistically expect in 2026.
Cost Breakdown by Project Size
- Small repairs (single chimney, small wall section): $500 – $1,500
- Mid-range projects (partial facade, multiple features): $1,500 – $7,500
- Full home restoration (entire exterior): $10,000 – $30,000+
- Large estates or historic buildings: Can exceed $50,000
- Per linear foot: Typically $6 – $13 in the DFW market
The per-linear-foot pricing reflects DFW's position at the higher end of the Texas range ($5–$12 statewide) and above the national average ($4–$10). This premium reflects the local market's strong demand, the post-2021 storm surge that drove labor costs up an estimated 10–20%, and the specialized skill required for quality mortar work. For a detailed look at regional pricing variations, the brick repair cost breakdown in Fort Worth provides useful context.
Hidden Costs That Surprise Homeowners
The base repointing cost is only part of the picture. Several additional costs frequently arise during projects and can significantly affect your total budget if you're not prepared for them:
- Mortar color matching: Custom mixing to match aged mortar can add $500–$2,000 to a project, particularly on older homes where the original mortar has oxidized to a unique color.
- Water damage remediation: If failed joints have allowed water intrusion into wall sheathing, insulation, or framing, those repairs can cost $5,000–$20,000+ on top of the repointing itself.
- Chimney crown or flashing repair: Tuckpointing a chimney often reveals damaged crowns or failed flashing that need simultaneous repair — typically $1,000–$5,000.
- Scaffolding or lift rental: Required for taller sections of wall or multi-story work, adding $500–$3,000 to the project cost.
- Permits: Most DFW municipalities require permits for significant masonry work, typically $100–$500.
Why DFW Pricing Is Higher Than the National Average
Several factors push DFW repointing costs above national averages. The February 2021 winter storm created a surge in demand for masonry repair that has sustained for years, driving up both labor rates and lead times. Skilled masonry labor — particularly craftsmen with expertise in mortar matching and historic restoration — commands premium rates in the DFW market. Material costs in the metroplex are higher than in rural Texas, and specialty expertise such as matching historic mortars or meeting preservation standards adds further cost.
The takeaway: if you receive a quote that's dramatically below the ranges above, ask why. Low-ball quotes typically indicate one of several problems — wrong mortar type, insufficient joint depth, rushed workmanship, or no insurance. Any of these shortcuts will cost you more in the long run than paying a fair price upfront.
Ready to get a detailed estimate based on your specific project? Our team can assess your brick, identify the right mortar type, and provide a transparent quote with no hidden fees or pressure to commit.
Get Your Free EstimateHow to Evaluate and Hire a Qualified Repointing Contractor in DFW
Finding a qualified masonry contractor in DFW isn't as simple as searching online and calling the first result. The market includes a wide range of providers — from highly skilled specialty restoration firms to general contractors who subcontract the work, to storm chasers who appear after disasters and disappear after payment. Knowing how to evaluate your options protects your home and your money.
It's Smart to Verify Contractor Credentials
Asking about licensing, insurance, and mortar specifications isn't being difficult — it's being responsible. Professional contractors expect these questions and welcome the opportunity to prove their expertise. A contractor who gets defensive or evasive when you ask about their license or mortar type is telling you something important about how they operate.
Licensing and Insurance: Non-Negotiables
Texas doesn't have a specific statewide "masonry contractor" license, but contractors performing structural work operate under licenses issued by the Texas Department of Licensing and Regulation (TDLR). You can verify any contractor's license status — and check for disciplinary actions — at tdlr.texas.gov. This takes about two minutes and is worth doing before any contractor sets foot on your property.
Beyond licensing, confirm that the contractor carries general liability insurance with a minimum of $100,000–$300,000 per occurrence, and workers' compensation insurance if they have employees. Ask for a copy of the insurance certificate — not just a verbal confirmation — before work begins. If something goes wrong during the project (a worker is injured, a window is broken, a wall section is damaged), you need to know you're protected.
Questions to Ask Every Contractor
These five questions will tell you more about a contractor's competence and integrity than any online review:
- "What ASTM C270 mortar type will you use, and why is it appropriate for my brick and climate?" — A qualified contractor answers this immediately and specifically.
- "How deep will you remove the old mortar, and how will you prepare the joints?" — The answer should include "2.5 times the joint width" and mention cleaning and dampening before application.
- "How do you plan to match the existing mortar color and profile?" — Look for answers that mention sample patches and approval before full work begins.
- "Can you provide references or photos of similar completed projects?" — Established contractors have portfolios and willing references. You can also explore their completed project gallery to see the quality of their work firsthand.
- "What's your timeline, and how will you protect the wall during curing?" — This reveals whether they understand the curing process and plan for it.
For additional guidance on finding qualified professionals in the area, the comparison of top masonry contractors in your area offers useful context on what to look for and how local providers compare.
Red Flags and Predatory Practices
The DFW masonry market has its share of bad actors, particularly in the wake of major weather events. Watch for these specific warning signs:
- Vague or evasive answers about mortar type — If they can't tell you the ASTM type, they likely don't know what they're using.
- Pressure for large upfront payments — Legitimate contractors ask for reasonable deposits (typically 10–30%), not 50% or more before work begins.
- "Proprietary" or "special" mortar mixes — This is often a way to avoid accountability for using the wrong material. Ask for the ASTM specification.
- Out-of-state contractors appearing after storms — Storm chasers often use subpar materials, charge inflated prices, and are unreachable when problems arise months later.
- Reluctance to provide insurance documentation — Any contractor who hesitates to provide a certificate of insurance is a liability risk.
- No written contract or vague scope of work — A professional proposal specifies mortar type, joint depth, timeline, and payment schedule in writing.
If you're ready to work with a qualified contractor who specializes in repointing and tuckpointing, our team brings the credentials, expertise, and transparency you deserve. We're happy to answer every question on this list — and then some.
Connect With Our TeamRepointing vs. Tuckpointing: Which Method Is Right for Your Home?
Now that you understand both methods, the mortar types, the costs, and the process, let's bring it back to the practical question: which approach is right for your specific situation? The answer depends on four factors — the extent of deterioration, your budget, the age and type of your brick, and your long-term goals for the property.
Choose Repointing If...
- More than 30% of your mortar joints show visible deterioration across a wall or section
- You want a cohesive, uniform appearance rather than a patchwork of old and new mortar
- Your brick is relatively uniform in age and type, making consistent mortar matching achievable
- You're planning a long-term restoration and want to maximize longevity — repointing done right can last 20–50 years
- You're willing to invest more upfront to avoid the cost and disruption of repeated patchwork repairs over the next decade
Choose Tuckpointing If...
- Damage is clearly localized — a single chimney, one wall face, or a specific section near the foundation
- Budget is a primary constraint and you need to address the most urgent problems first
- The brick is older or more delicate and benefits from selective, careful repair rather than full-scale disturbance
- You plan to monitor the wall over time and address additional areas as needed in future seasons
- You want to address immediate water intrusion risks without committing to a full restoration project
In practice, your contractor may recommend a hybrid approach — full repointing on the most deteriorated sections and targeted tuckpointing on areas with minor damage. This is a reasonable strategy that balances thoroughness with cost efficiency. The key is getting a professional assessment rather than guessing from the ground. Our professional brick and stone repair services include a thorough evaluation of your wall's condition so you get a recommendation based on what your home actually needs — not what's easiest or most profitable for the contractor.
Protecting Your Investment: Maintenance After Repointing or Tuckpointing
Getting your mortar repaired is a significant investment — one that should last for decades if the work is done correctly and you follow a basic maintenance routine. The good news is that post-repointing maintenance is neither complicated nor expensive. A little attention each year can add years or even decades to the life of your repair.
Annual Inspection Checklist
Twice a year — once in spring after the freeze-thaw season, and once in fall before winter sets in — walk around your home and look at the mortar joints with fresh eyes. You're looking for the same signs you identified before the repair: new cracks, crumbling spots, efflorescence, or any areas where mortar appears to be separating from the brick. Take photos and compare them to photos from the previous inspection to track any changes.
Also check interior walls near the foundation and exterior walls for any signs of moisture — water stains, damp spots, or musty odors. These can indicate that a new area of mortar failure is allowing water intrusion. Catching these issues early, when they're still small, is the difference between a $300 caulking repair and a $5,000 water damage remediation.
Minor Maintenance and Caulking
Small cracks or gaps that develop between inspections can often be addressed with masonry-specific caulk — products designed to bond to brick and mortar and remain flexible through temperature changes. This type of minor maintenance typically costs $100–$500 annually and can significantly extend the life of your repointing by preventing water from establishing a foothold in new cracks.
The important caveat: use products specifically designed for masonry. Regular silicone or latex caulk doesn't bond properly to brick and mortar, and some products can actually trap moisture or discolor the brick. When in doubt, ask your original contractor what they recommend for your specific mortar type and brick.
Waterproofing and Protective Treatments
One of the most effective ways to extend the life of your repointing is to apply a breathable waterproofing treatment to the wall. "Breathable" is the key word here — the treatment should allow moisture vapor to escape from inside the wall while preventing liquid water from entering from outside. Non-breathable sealers that trap moisture are counterproductive and can cause the very damage they're meant to prevent.
Applied every 5–10 years, a quality breathable waterproofing treatment can significantly extend the life of your mortar and brick by reducing the amount of water that cycles through the wall. This is particularly valuable in DFW, where freeze-thaw cycles and hail events create repeated opportunities for water infiltration. Our cleaning and waterproofing services use products specifically selected for DFW's climate and the types of brick and mortar common in the region.
Common Mistakes Homeowners Make (and How to Avoid Them)
After working through all the information in this guide, you're already better positioned than most homeowners to make a good decision about your brick walls. But it's worth being direct about the most common mistakes — not to make you feel bad if you've made them, but to help you avoid them going forward.
The True Cost of Waiting
This is the mistake that costs homeowners the most money. A repointing job that costs $2,000 today can easily become a $20,000 repair in five years if water intrusion is allowed to continue unchecked. Water that enters through failed mortar joints doesn't stay in the mortar — it migrates into wall sheathing, insulation, and framing, causing rot and mold that requires demolition and reconstruction to fix. Brick that's exposed to repeated water infiltration begins to spall, potentially requiring replacement rather than just repointing.
The math is straightforward: proactive maintenance is always more cost-effective than emergency repair. If you've noticed signs of mortar failure, the time to act is now — not after the next major storm. Understanding the cost of deferred brick maintenance makes this calculus very clear.
"Allowing failed mortar joints to persist can lead to water intrusion costing $5,000–$20,000+ for repairs to underlying structures, mold remediation, and brick replacement — compared to the initial repointing cost of potentially a few thousand dollars. Failure to repoint can accelerate brick degradation, potentially doubling repair costs." — Construction cost data, BIA technical notes
Why the Cheapest Quote Isn't Always the Best Deal
In a competitive market, it's tempting to go with the lowest bid. But in masonry restoration, low-ball quotes almost always indicate one of several problems: wrong mortar type (cheap and easy to apply, but damaging to your brick), insufficient joint depth (quick to do, but the new mortar won't bond properly), or rushed workmanship that skips critical steps like joint cleaning, dampening, and layered application.
Poor workmanship fails prematurely — often within 5–10 years — requiring the entire job to be redone. When you factor in the cost of re-repair, the "cheap" contractor ends up costing you significantly more than a mid-range quote from a reputable professional. Ask for detailed written proposals that specify mortar type, joint depth, timeline, and payment schedule. Compare proposals on those specifics, not just the bottom line number.
Other common mistakes worth avoiding: attempting DIY repointing on large wall sections without the right tools and experience (the joint preparation alone requires specialized equipment to do correctly), failing to verify insurance before work begins (leaving you liable if a worker is injured on your property), and neglecting post-repair waterproofing (which significantly shortens the life of the repair in DFW's climate).
Frequently Asked Questions
Repointing involves removing and replacing all mortar joints in a wall or section, creating a uniform result across the entire surface. Tuckpointing, in its precise definition, targets only the visibly deteriorated joints, leaving sound mortar in place — a more selective and cost-effective approach for localized damage. In practice, most DFW contractors use the terms interchangeably to describe any process of removing old mortar and replacing it with new. Understanding the distinction helps you ask better questions and evaluate proposals more accurately, even if the terminology varies between contractors.
Look for crumbling or powdery mortar, joints with visible holes or significant erosion, loose or cracked mortar lines, and efflorescence (white chalky deposits on the brick surface). If you can brush mortar dust off the joints with your finger or a wire brush, the mortar has lost its structural integrity. These signs are especially significant if they appear after freeze-thaw events or severe weather, or if your home was built before 2000. A professional inspection can confirm the extent of the damage and determine whether repointing, tuckpointing, or a combination of both is the right approach.
Type N mortar is suitable for interior or sheltered exterior applications where exposure to severe weather is minimal, and it's compatible with the softer brick common in pre-1970 construction. However, for exterior walls, chimneys, and areas exposed to DFW's freeze-thaw cycles and wind loads, the Texas Building Code recommends Type S mortar for better durability and bond strength. Your contractor should evaluate your specific brick type, its age, and the location of the repair before specifying a mortar type — and they should be able to explain that decision clearly if you ask.
Using mortar that's too hard — such as straight Portland cement or Type M mortar — on older, softer brick causes a serious problem: the hard mortar prevents the brick from flexing naturally, transferring stress from thermal expansion and foundation movement directly into the brick face. This results in spalling, where the brick surface literally flakes and pops off. The hard mortar also traps moisture inside the wall rather than allowing it to move through, which accelerates freeze-thaw damage to the brick itself. This type of damage is irreversible and requires brick replacement — a significantly more expensive repair than the original repointing would have cost.
Chimney tuckpointing in the Fort Worth area typically ranges from $700 to $2,500 or more, depending on the chimney's height, accessibility, and the extent of mortar deterioration. Pricing is generally calculated based on the linear footage of joints repaired and the complexity of the work. Additional costs frequently arise when chimney crown or flashing repairs are needed simultaneously — issues that are often discovered during the tuckpointing process. Getting a detailed written estimate that separates the tuckpointing cost from any ancillary repairs helps you understand exactly what you're paying for.
Small, isolated repairs — a few crumbling joints on a low section of wall — are within reach for a careful DIYer with the right tools and materials. However, repointing significant sections of wall requires skill in joint preparation (including achieving the correct removal depth), mortar mixing, layered application, and tooling to the correct profile. Getting any of these steps wrong can result in premature failure or, worse, brick damage from incorrect mortar type. Professionals also ensure code compliance and proper mortar specification, which is critical for longevity. For anything beyond minor spot repairs, professional work is a better investment — properly done repointing lasts 20–50 years.
Ready to Protect Your Brick Walls? Get Expert Guidance Today
Whether you're seeing the first signs of mortar failure or planning a full restoration of your home's exterior, you deserve straightforward answers and honest guidance — not a sales pitch. Our team of experienced masonry professionals serves homeowners across Dallas-Fort Worth and understands exactly what North Texas's climate demands from brick and mortar.
We'll assess your specific situation, explain your options in plain language, and provide a transparent estimate based on what your home actually needs. No pressure, no surprises — just the expertise and honesty you deserve when making a decision about your home.
Schedule Your Free ConsultationBrick & Stone Master · 3800 Haslet-Roanoke Road Suite 32, Roanoke, Texas 76262